Back to the trip!
Before I walk through Blossom note that all the pictures are clickable for a larger version. If you've any questions or comments on what we've done - or why, please don't be shy to ask. We're proud of what Blossom is becoming and almost everything in her has been the result of much discussion and consideration.
This is also a very picture heavy, with over 200 in here, so I'm not going to start any until after the jump. Those of you that are bandwidth impaired be warned!
To Blossom!
The first set of pictures walks us around the outside of Blossom.


This shot clearly shows the "maintenance strake" added to the hull in the engine room. It's what provides standing room inside.

No, that's not the "ABT economy fin" :-) The final step in the stabilizer install is alignment.

Transducer installed. This and the two steering pumps were sent by our electronics installer to the yard for installation. The transducer has a small speed wheel on the bottom which will provide true speed relative to the water. Combined with the GPS derived true sped over ground and the electronics will calculate actual current. Useful information to know when planning long passages over water like the gulf stream.

We had the boot stripe raised a few inches to line up with the swim platform. Standard location results in a line going under the swim platform, which looks a little odd.

Wing engine prop shaft. No seals or shaft log in place yet. The reason for that will become apparent later in the post.

Looking through the hull at the bottom of the wing engine. The fitting you see will be plumbed into the oil change system.


Main shaft all complete, ready for the prop to be installed.


The line cutter is a serious piece of equipment.

Stern thruster also fully installed. The small hole you see above the blade leads to a valve fitting in the lazerette. It will allow us to bleed air out of the tube to ensure the blades are fully submerged.

The three round circles under the swim step are the under water lights. SeaVision SV19 - 50W HID bulbs. Very bright! I have no idea what the large hole on the left is for.

The Dynaplate is used for grounding a SSB radio.

This is the lightening rod grounding plate. It's connected to a wire "tree" at the top of the stack with a fat copper strip.

The swim step stanchion holes are in place. The hole in the middle of the platform will allow us to remove one of the stanchions and have a place to put it.

Working on the dive ladder.

One of the many hawse pipe and cleat combinations that were being installed while we were there.

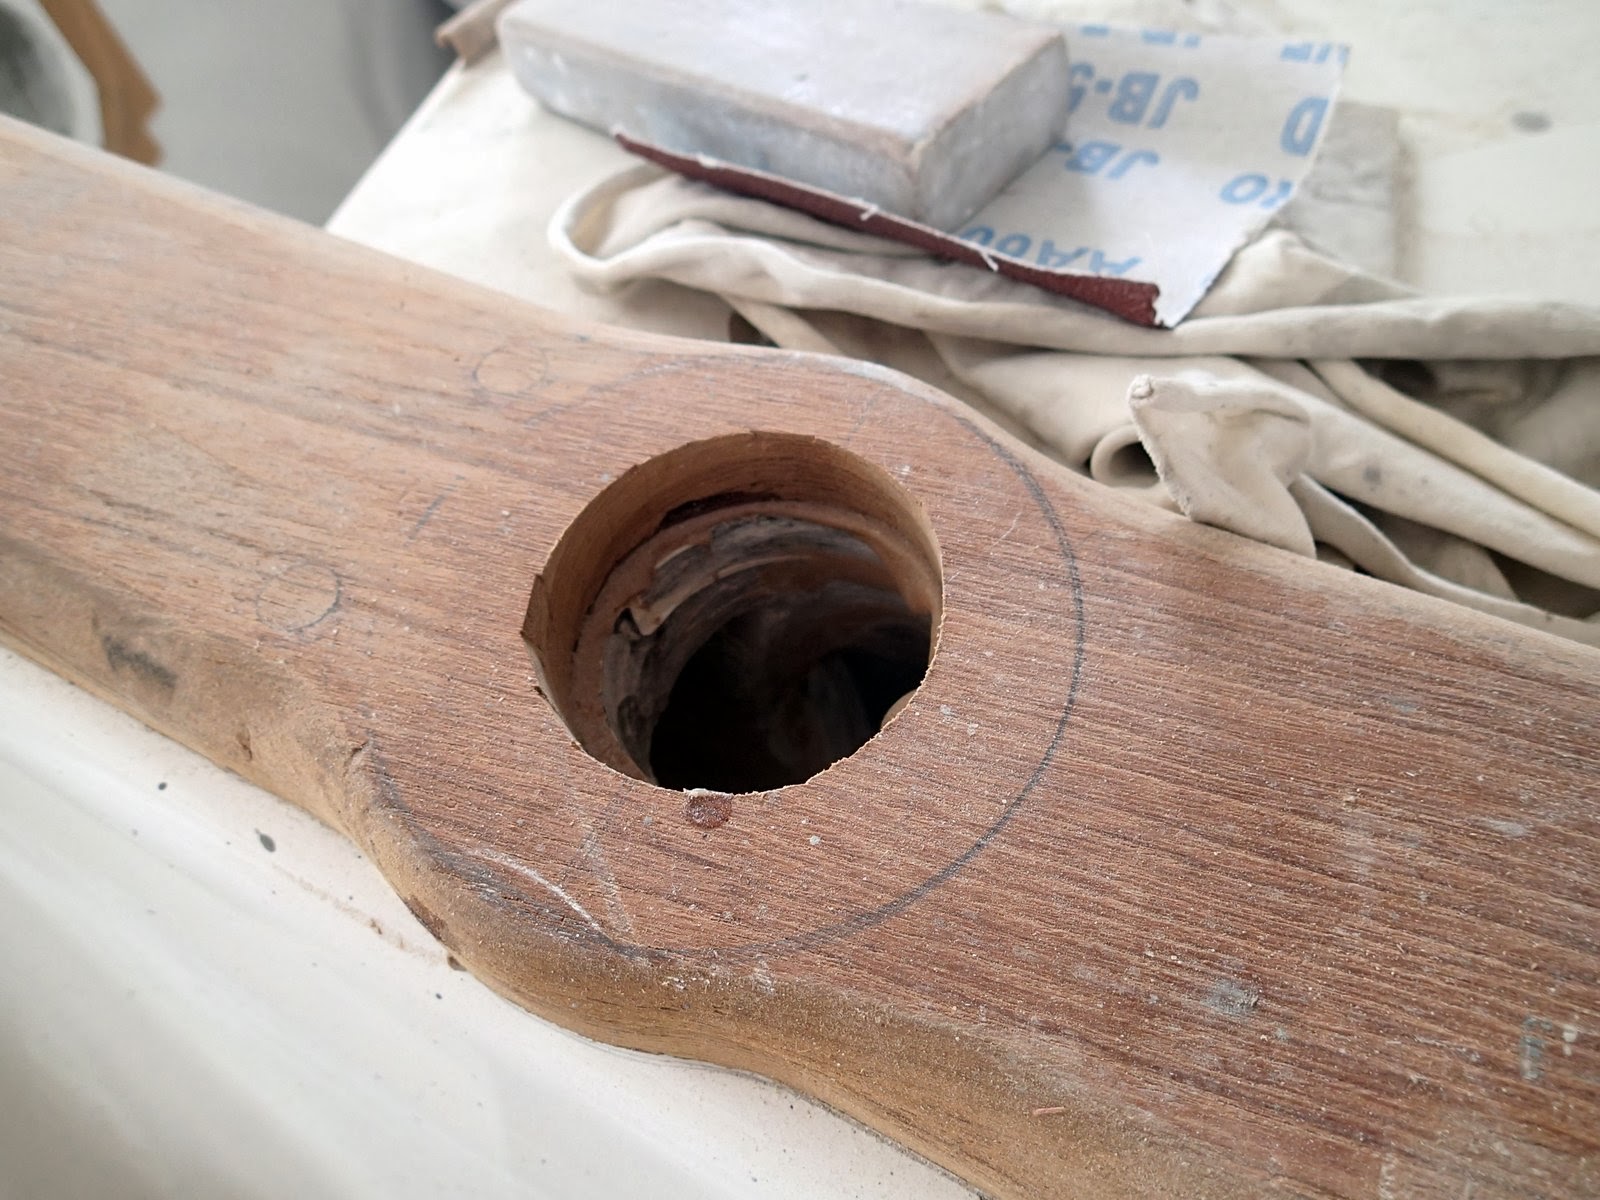
Teak cap rail and a close up of the hole for the rod holder - a topic of much discussion last July.

Transom door, ready for installation. The markings show where the handle will be and how it'll mount to the door.
Shore power connections will be installed below this door.

The salon door is a double-window dutch door

The top door can be opened and secured independently.

Davit compression pipe, tucked away in the corner.

All the tank fills (water, fuel, pump out) are installed. They seem to bottom out without the o-rings engaging but our project manager says they're water tight.

The BBQ console has been installed.

Close up of the BBQ location. Blossom will be carrying no propane, so the BBQ is going to be a Miele electric grill.

Inside the console is the airsep for the large 20KW generator in the engine room. This separates the water from the exhaust gases and makes the generator very quiet during operation.

The lazerette hatch fits very nicely.


The stern windlass has been installed inside the seating console.

This hole will have a side-roller hawse installed. When using the windlass, we'll feed the rope out of the boat through here.

The locker in the transom next to the windlass is perfectly situated to hold the scuba tank air fill and hoses. There's also enough room to store a couple of 100' hoses so we can dive off the boat without having to wear tanks. Great for checking the hull or even the anchor.


The stern docking station. Great for backing Blossom into a slip. This and the starboard station will probably become redundant if we decide to add a Yacht Commander remote control.

Another hole awaiting its hawse pipe and cleat.

The boarding door up by the pilot house on the starboard side. In july this was lines in the fiberglass. Now it's a finished hole.

One of the two cavernous lockers in the Portuguese bridge.


A huge anchor locker. Along with 400' of chain, this locker will likely hold spare lines and who knows what else. We had a shelf and a divider put in to help keep things tidy in here. All the plumbing you see is for the VIP shower and will be covered by a box when the locker is complete.

The chain stopper

Bowsprit complete with anchor rollers. Despite there being two rollers, we'll only have one (very large) anchor riding up here.

These cleats provide the capability of securing the chain using line, taking the load off the windlass and the chain stopper.

The groove in the right hand roller needs to be re-machined to match our Ultra anchor.


Forward shore power connections. We've put in Smart Plugs, which reduce the chance of an electrical fire at the shore power connections - one of the leading causes of boat fires. Thanks to all the wood and resin in these boats, when they burn they burn to the waterline.

View of the pilot house from the foredeck.

The door from the Portuguese bridge to the foredeck is ready to be mounted. Looking at the mounting hardware, you can guess how heavy the door is.

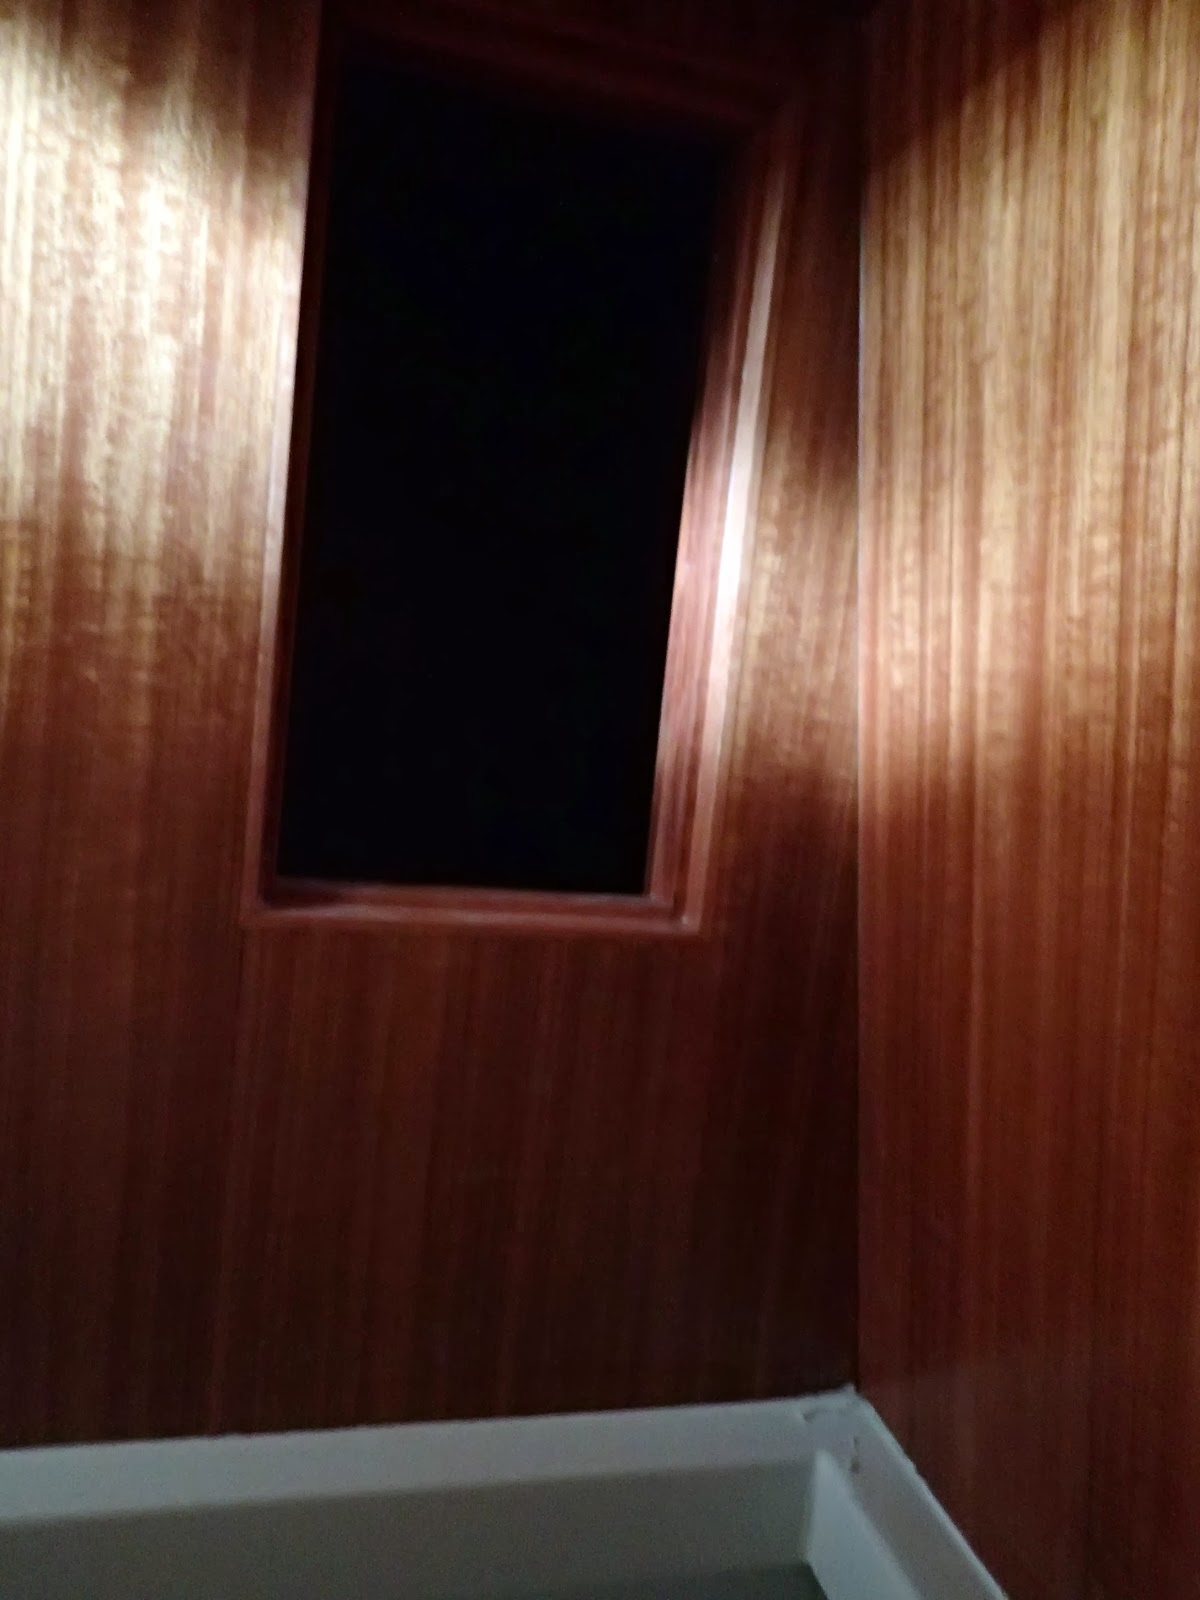
Tucked away inside the Portuguese bridge is a small hatch down into the master stateroom. More light!


We're one of the first Nordhavns to get the glued in windows. They're really looking good!

Not much change to the boat deck since July.


Both aft portlights in the pilot house have been installed. They open, so along with the dutch doors, we should be able to get great air flow through there when the weather cooperates.


The flybridge is looking good. This bench seat is an something we added after seeing it on another boat. It'll be a comfortable place for the co-pilot to lounge while we're underway.

Underneath the helm is this huge space. The bench seat does mean that we can only access this space from the port side. This is the pressure tank (with gauge) for the hydraulic steering.

Looking down the chimney into the engine room.


The stack hadn't been installed yet but was staged nearby, ready and waiting. Looking up the stack, you can see the conduits for wiring. There's lots of expensive gizmos that get installed at the top of this that need to be connected to other expensive gizmos in the pilot house.

The hard top hasn't been installed, either.
Moving inside Blossom, the progress has been great. It looks like the woodwork is done as is most of the stone work. There are still appliances to be installed and the lighting to be finished, but she's almost there.
The Salon


The salon looks great! The wall covering really helps to brighten up the space. It's looking pretty empty - and large - right now, but that will change once we've put in the couch, chairs and tables.


A close up of the starboard, aft cabinets. The counter top will provide a great "landing area" when we first enter Blossom.

This is a pretty large cabinet port, forward. The bottom will need to be kept relatively clear to allow air flow to the air handler back there. Many owners put the audio stack for the boat in here.

We've removed the breakfast bar and sized the interior of the cabinets to 11" to fit normal sized plates. Unfortunately, the lip the yard put on the shelves reduces this to 10.5", so we're revisiting our flatware. Stephanie has found some great "oblong" dinner plates that would fit.

I really like how the overhead turned out.

The cutout in the stairwell really brightens up the stairs down to the utility room. There's going to be a stainless steel grab bar installed in the cut out.


Under the stairs going up the the pilot house we've installed two drawers. Along with storage accessible by lifting the stair tops, we'll have a good place to store heavier goods - like cans of food.

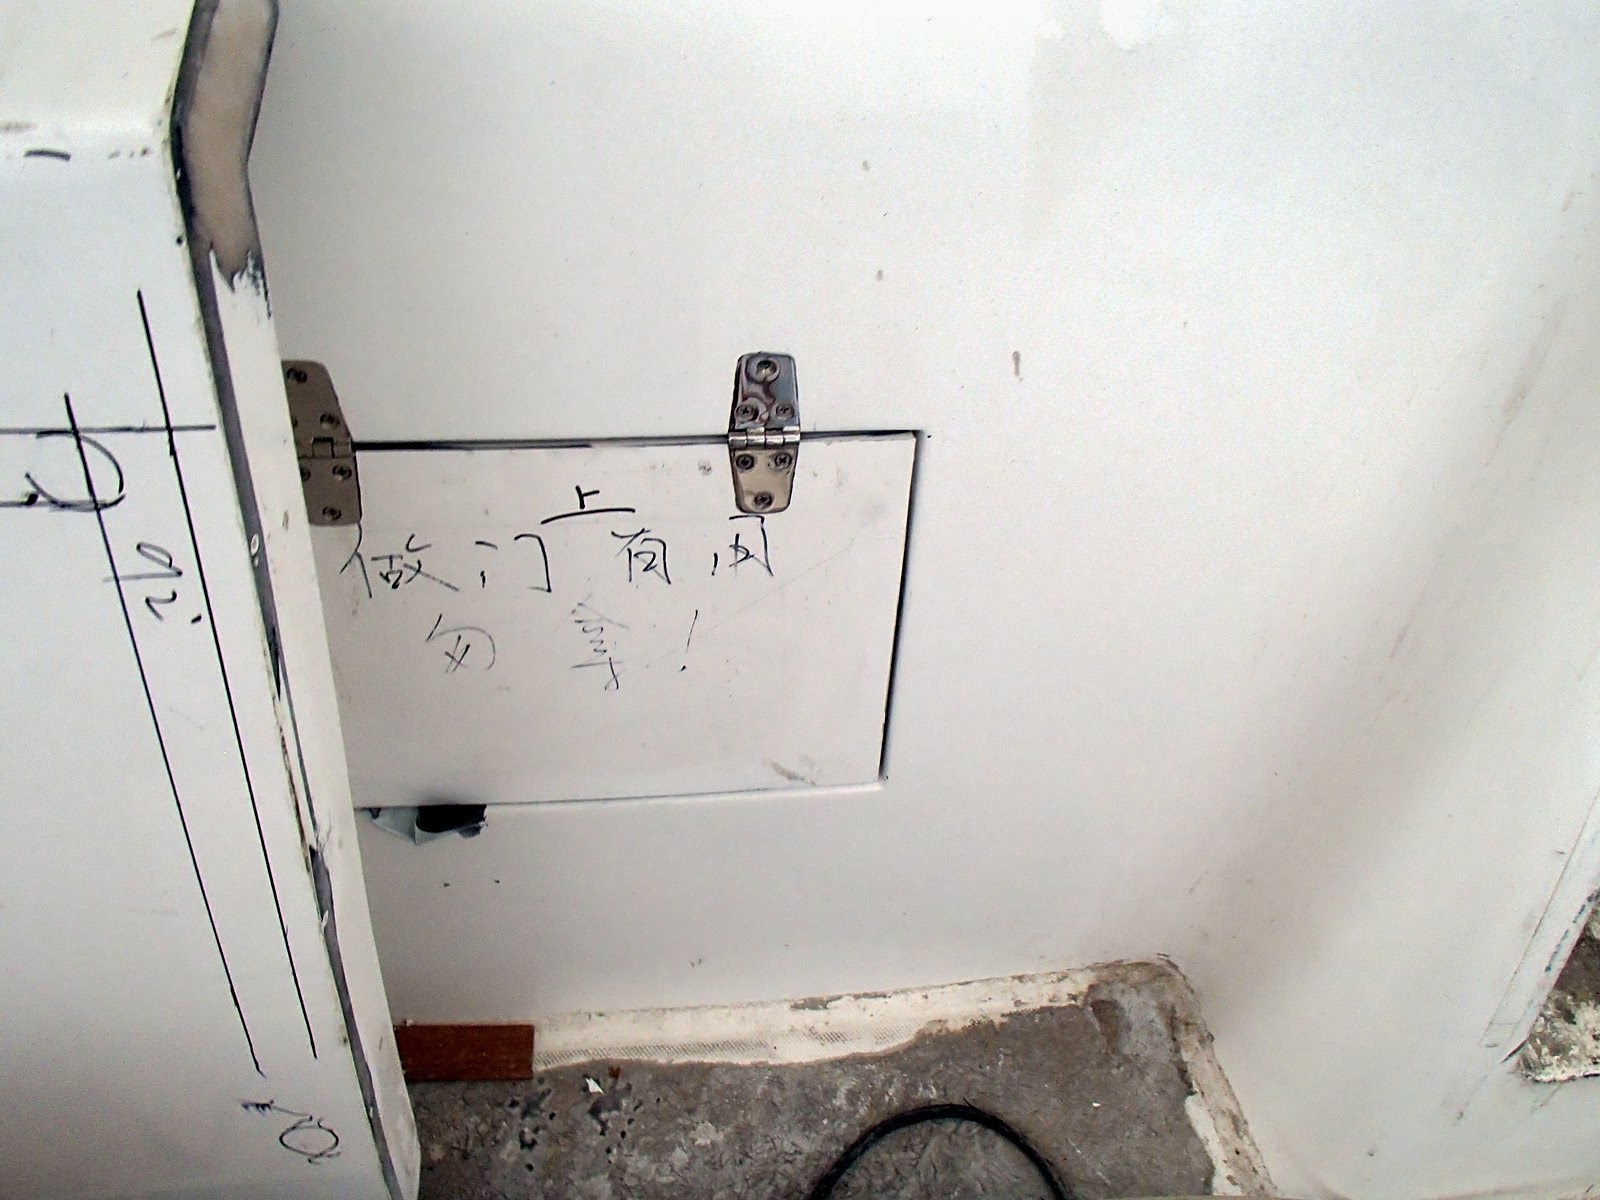
This space is usually accessed from the master head via a small door behind the head. By making the access in the stairwell, we've created a great place to store appliances.

The "standard" pantry located before the master stateroom.


Bringing in all the doors and drawers. If ever there's a sign that the wood work is done, this is it!


The doors and drawers, once installed, really pull it together!
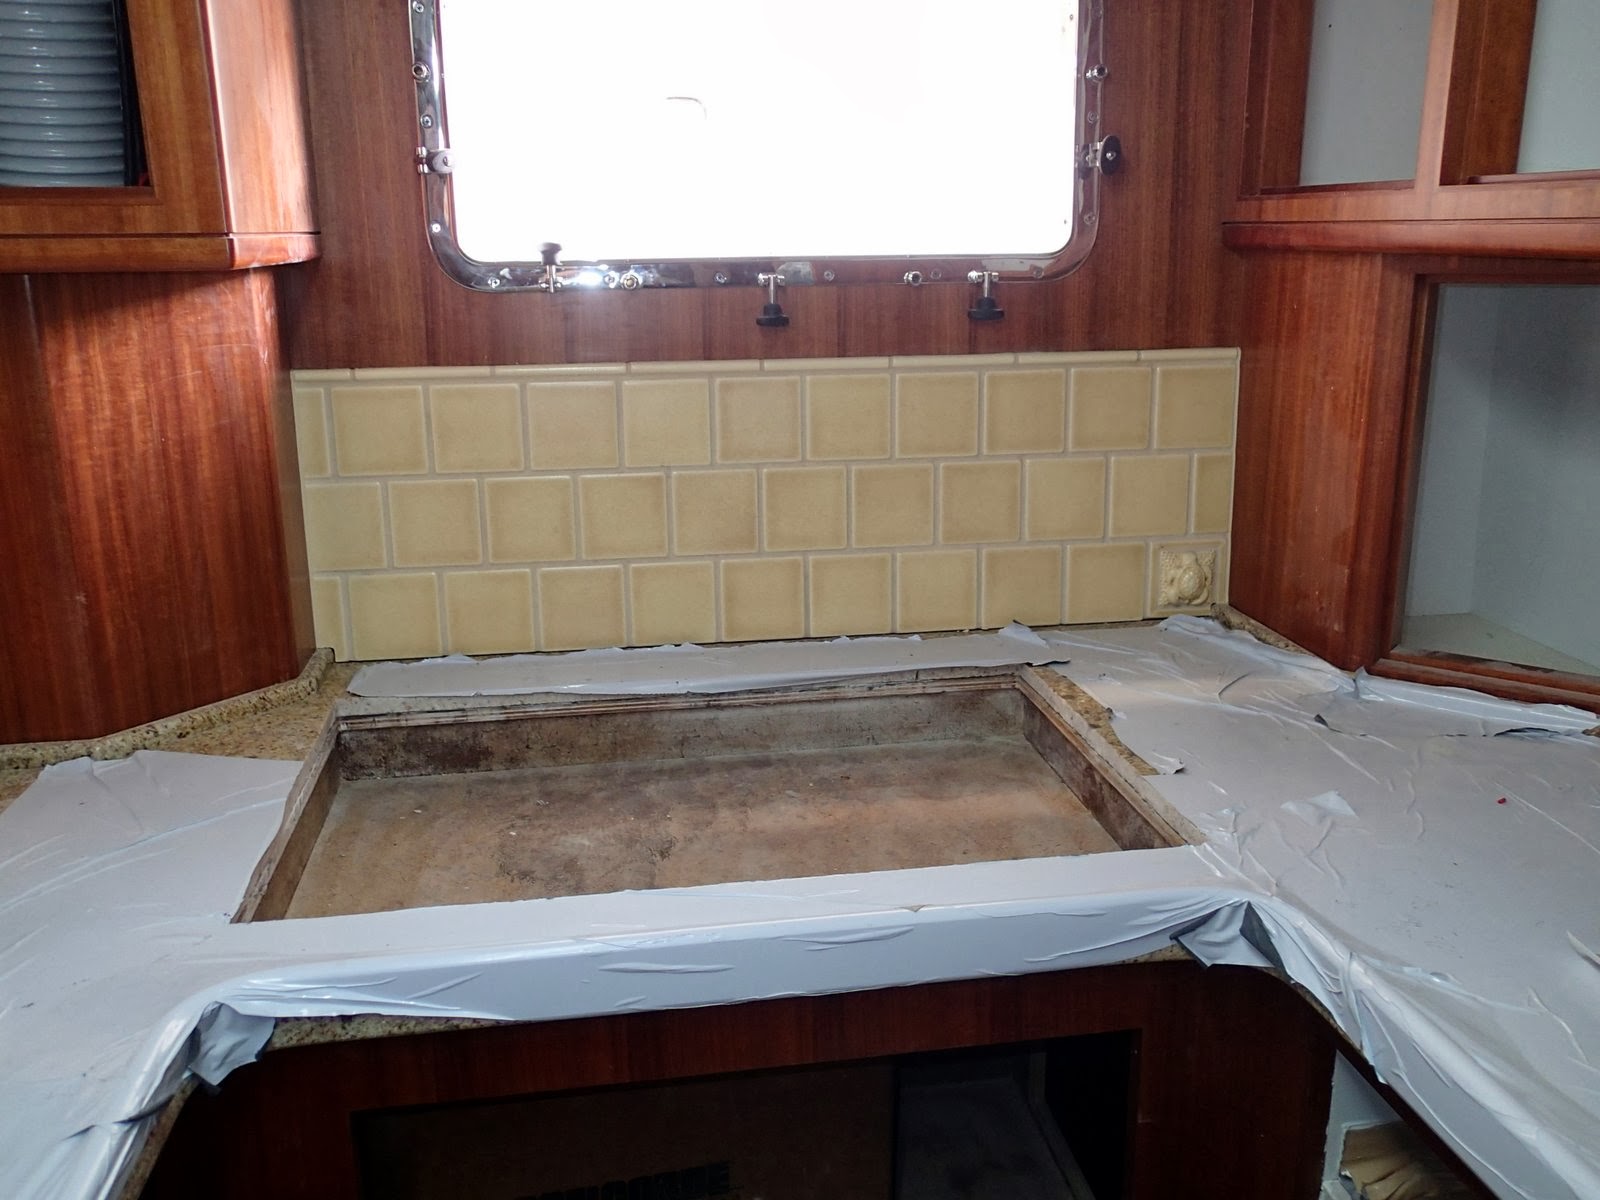


The backsplash tiles in the galley look really good.


A fiddle all around the granite counter tops protect the wood (and the floor) from errant spills.

I tried to remove the cardboard for a shot of the floor, but it wasn't going to happen easily.

By going to a large single sink we not only increased the available space in the sink (from the standard two-sink), but we also were able to increase the width of the drawers to the sink's left (seen in the picture above this one) to something more useful.

Space for the Miele dishwasher. You can see the port-side air handler behind.

By leaving this as a locker rather than opting for the "spice rack", we've made a space perfectly sized for a soda stream!
The Master Stateroom

Forward bulkhead. A large mirror installed over the drawers will open the space up significantly.

Drilling holes for the overhead lights!

The cherry headboard.

The largest blank wall in the boat. Steph is already planning some kind of wall hanging to put here.

Full length mirror.

The second largest blank wall! Usually, owners mount a large TV here. As we're having a drop down screen, it leaves us with the option of putting up more art - wall hanging perhaps? :-)

Plenty of storage under the bed, along with access to the fresh water (painted blue), grey water and black water tanks.

The bedside table drawers I was shown in July are finally installed.

Air handler for the master bath under the forward stairs.

One of only three full length hanging closets on Blossom.

Putting the wall covering on in the master bathroom.

Looks good!


Fitting the grill in the shower soffit.

Shower floor. Note the addition of two more drains. With two forward and two aft, we shouldn't experience any pooling of water if the trim of Blossom is not quite right - quite possible as fuel is added and used.

Door frame detail. The wires hanging down will power the motorized screen.


Fresh and grey water tanks. For whatever reason, Nordhavn put three separate senders in each tank, one for high, mid and low. I may decide to put an digital sender in as well for the Maretron install.


Installing the door between the master and the galley. What looked like uneven panels when the doors sat in the yard line up perfectly with the wainscote once installed.

Nice and bright! A mirror over the chest of drawers yet to be added.

Half-length hanging locker. Guests should limit the number of evening gowns they bring aboard!


The lower of the two spaces will have locker doors to make a reasonable headboard. Along with the outboard bedside shelf and the larger inboard bedside table, it should be comfortable for 2 people.

Steph's sewing table.

Storage for the sewing machine.

Sewing machine cutout.

Step up floor under the table for comfort and a tiny amount of storage.


Bathroom vanity is done. I'm sure the doors and drawers are all on by now.
The Basement
Under Steph's sewing room sit my man-cave!

Water maker.


Fresh water manifold and pump. The pump needs to be rotated a little so that access to the impeller (on the left of the pump) is possible.

Bow thruster and anchor wash down raw water pump.
The Pilot House


Looking down both flights of stairs from the pilot house.

At the top of the forward stairs is the charging station.

View of our "captains cabin".


We increased the depth of the settee for comfort.

Testing the settee cushions for comfort. I asked them to make softer cushions than they normally do. Seemed pretty comfortable to me!

Pilot house table top.

The day head


Inside the Captains Cabin.

I've asked for this gap in the fiddle to be closed.
This is a found space behind the microwave


The electrical panel is wired, as are the various electrical boxes under the helm.

Air handler under the settee.

With the addition of a duplex outlet, this space becomes our printer station.
The Utility Room

Starboard stabilizer actuator next to the stairs going down to the utility room.

Storage space under the stairs made accessible by lifting stair tops.

This locker will be a good place for ear defenders and the like.

Port side stabilizer fully installed along with the ABT "Monobloc."
The Engine Room
Working our way clockwise around the engine room, startiung just to the left of the door.

Day tank with inspection hatch.

Fuel manifold showing supply and return levers.

We forgot to delete the standard transfer pump after specifying the fuel polisher. This is it's timer. I doubt it'll get much use.

Racors. Other than the double Racor for the main engine, I haven't worked out which one is for which engine. Yet.

Fuel polisher

The two small pumps on the left are for fuel transfer and a pressure boost for the 9Kw gen in the lazerette.

Automatic fire extinguisher.

Wing engine.

The 'Z' drive transmission.

A problem with the mounts. You can see the rear mounts are compressed while the front mounts are extended. This needs to be resolved.

Normally the exhaust has water injected here but because there isn't enough room in the starboard cabinet in the salon for a riser, ours will have a dry stack exiting here and extending to the rear of the space before looping up into the cabinet in the salon. The water will be injected after the loop.

Hydraulic PTO. Forgetting to take the weight and location of this into account is why the mounts are wrong.

Looking down through the hull.

The transmission case was damaged at the oil drain. A new transmission has been ordered and will be installed.

The supply tank for the wing has to moved to the port side thanks to the extended dry stack on the wing engine. It'll go in this space.

20 Kw generator without sound shield.

Hydraulic oil reservoir.

More hydraulic switches.

We've added spring loaded valves for the sight glasses in all the fuel tanks.

Heat exchanger used to cool the hydraulic oil. When performing close quarter maneuvering there isn't enough water flow over the keel cooler, so this makes sure the oil remains at a reasonable temperature.

The main engine. We're going to have all that wiring moved off the engine and tucked away under the deck somewhere.

Two 24v 190a alternators on the main engine.

PSS dripless shaft seal.

A bilge full of nasty. Hopefully gone before we see her again!
The Lazerette
Once again, working clockwise from the left of the door.

Main battery switches.

Davit pump.

These hoses head up the the davit.

High pressure washer on the left, 9Kw generator muffler on the right. We're having the floor modified slightly so we can get to the muffler drain easier.

Second water maker.

Air compressor.

One of the three underwater lights.

The two outboard lights are only accessible through a hatch that's a good arm's length forward. I've asked for additional hatches to be put aft for easier access.

9kw generator gen sep

A tangle of hoses that will eventually become steering lines. You can also see the top of the stern thruster as well as the valve that can be used to bleed the air from the thruster tube.

One of the two accusteer steering pumps (on the left) and the large water pump for the AC unit.

Chilled water AC.

Dive compressor.

Around the Yard
At the end of the second day, we took a wander around the yard to see if we could find any of the gear that has yet to be installed on Blossom. We came up trumps!

Majilite ceiling panels.

Dishwasher

BBQ grill

Trash compactor

One of the many port lights.

This is the "standard" console which I'm sure will be re-purposed for another boat.


All the doors and drawers.

Best guess is that this is the fuel locker.

Lot's of lead ballast


The handrails for the stairs going up to the pilot house.
Wow, lots of new stuff! I had to open a text file to keep track of all my reactions:
ReplyDeleteI like the economy fin!
Jealous of your stern thruster and stern docking station, but glad we don't need grounding plates or a davit compression pipe. I'm guessing your hydraulic davit will be MUCH quieter than our electric one, though.
Looking forward to seeing what the underwater lights look like. Are they white? Or a rotating rainbow of colors?
Also jealous of your swimstep stanchions. We really need to install some.
That salon door! I'm swooning from it's macho water tightness!
Interesting to put extra lines in the anchor locker. Ours is pretty damp even with drains; I guess the chain itself holds water with all its surface area.
I like the SmartPlugs. Are you also going to have a shore cord retraction system like a Glendinning? I love ours for handling 100 ft of heavy 50amp cable.
Interior woodwork is really gorgeous, even surrounded by dusty plastic sheeting. She is just going to glow inside. I wish more of our walls were light fabric. No need for floor to ceiling wood, especially below decks.
The animal tiles in the galley are fantastic! So cute!
The wiring on the main breaker panel is an OCDers dream. Reminds me of Odyssey's. Vector's is rather chaotic.
I hope you can get the wing engine issues fixed quickly and completely.
I didn't realize you were installing 2 water makers? Good to have a backup system. You did install the special coupling that allows your water to pump into our tank, right? You know, for our backup system.
We've gotten loads of grief from sailboaters about having a dishwasher. Yours is bigger, so you can intercept those comments.
Surprised that the lead ballast isn't installed yet. I would have thought that would go in much earlier.
She's looking fantastic! Can't wait to meet her in Florida!
Hi Louise!
ReplyDeleteYeah, she's coming along. :-)
To answer your questions:
The underwater lights are 50w HID - so bright - but only one color (white). They're the same ones we installed on Lucky and never used. We can put colored inserts into the housing if we want.
The lines in the anchor locker are more likely to be anchor lines rather than tie-up lines. Probably put our sea anchor / drogue in there as well.
We do have a Glendinning. Only one for the 50a house and it's in the transom. If we need to plug in for air, we'll have to use a loose cable.
We'll pump over fresh water for you anytime. We'll swap it 1-for-1 for diesel :-)
The reason why sailboaters give you grief about the dishwasher is because they don't have one :-) I'm also sure that a dishwasher is the least thing that sailboaters will find to object about with Blossom.
The lead ballast is in - that's half of the yard's stash.
You just made my Monday! Been looking forward to this next update!
ReplyDeleteShe is beautiful. I only joined your journey the other day but thought I should go back to the start. I have been following Sean and Louise for many years though on their 'Odyssey' and have enjoyed the jump off the hard. As a sailor in my distant past I am certainly jealous of the dishwasher but if I ever make the move to a trawler it will be on my list of must haves. That said it is incredible all of the "must have's" that are being added to my list as I follow yours and Vectors stories.
ReplyDelete